Week 3
Background
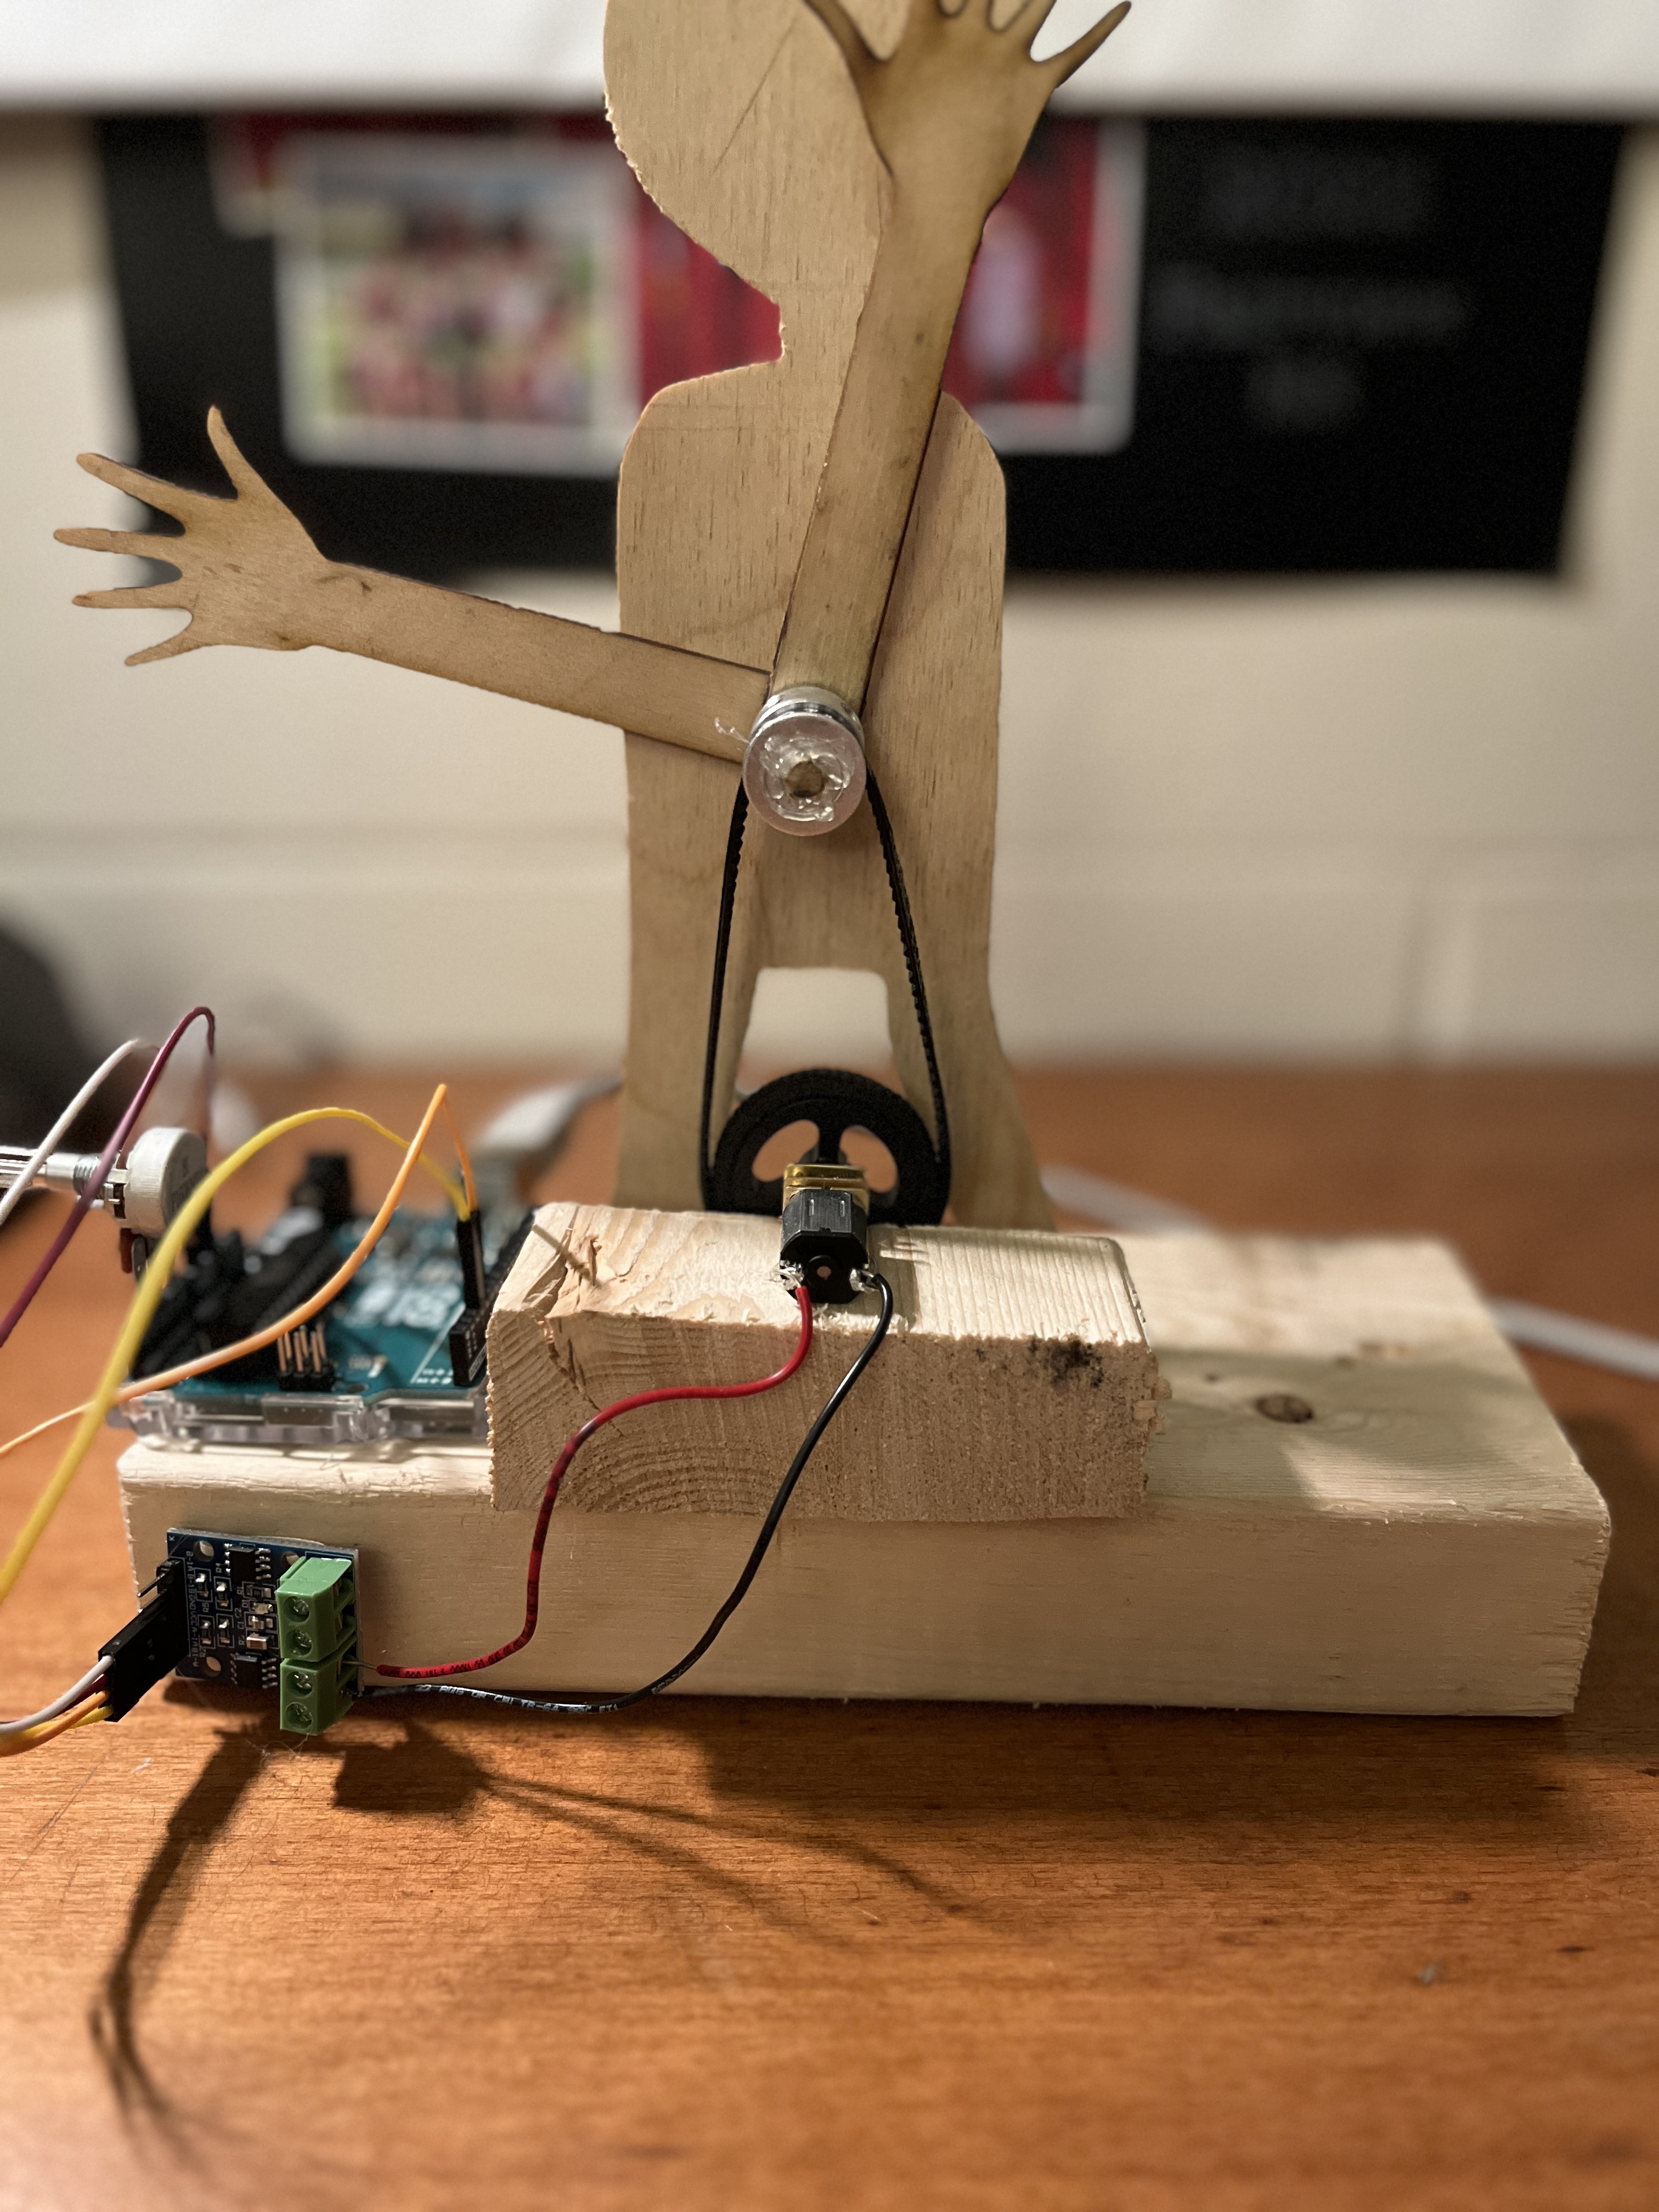
For this week's project, we were tasked with creating some sort of kinetic sculpture—a description I interpreted to mean anything that moves. Consequently, I chose to create a moving person sculpture that waves hello repeatedly. Though seemingly simple, this project had many technical challenges. However, now that it is done, it brings me lots of joy whenever I see it waving on my desk!
Creating the Base
Given the week's emphasis on hand tools, I decided to use a scroll saw and hand saw to create the frame of this project. In particular, I drew an outline of a person by hand and cut it out using the scroll saw. While I had never used the scroll saw for such an intricate outline before, I think it turned out rather well!
After cutting the person, I used a spare 2x4 block of wood and the drill press to create the base. Indeed, by simply drilling out two large holes and filling them with wood glue, I was able to create a rather sturdy base into which to glue the person (I ultimately employed a similar technique for the moter mount as well). If I were creating a more professional project, I would likely have employed a CNC mill or more precise machine to create rectangular slots rather than circular holes. However, for the purposes of this week's assignment, I think the dril press was adequate.
Lasering the Details
After creating the more crude details (namely the body, base, and motor mount) using hand tools, I then transitioned into using the laser cutter to create the more intricate pieces. In particular, I didn't trust myself to cut the hands or heart with a manual saw, and I thought the precision of a laser cutter would be a better fit. While I did struggle to dial in the settings for the thickness of the wood, once I got the settings correct, I think the hands and heart came out pretty well!
Adding Movement
Once all of the pieces were cut, it was time to make the sculpture move! Initially, my idea was to connect the motor directly to an arm and have the singular arm wave. However, after creating all of the individual pieces, I realized that it would look strange for only one arm to be moving. With the weak joint of the body and the base, I also was worried about connecting the motor directly to the body.
With this in mind, I decided to modify my plan. To move both of the arms together, I glued them to a singular dowel and added a gear on the end. I then connected this gear to a belt which was looped onto the motor (as depicted below).

const int A1A = 3;
    const int A1B = 4;

    void setup() {
      pinMode(A1A, OUTPUT);
      pinMode(A1B, OUTPUT);

      pinMode(A0, OUTPUT);
      pinMode(A4, OUTPUT);

      digitalWrite(A0, LOW);
      digitalWrite(A4, HIGH);
    }

    void loop() {
      int pot_value = analogRead(A2);
      int new_value = map(pot_value, 0, 1023, 255, 0);
      motorA(LOW, 0);
      delay(1000);
      motorA(LOW, new_value);
      delay(250);
      motorA(LOW, 0);
      delay(1000);
      motorA(HIGH, new_value);
      delay(250);
    }

    void motorA(byte d, int s) {
      if(d == 1){
        analogWrite(A1A, 255-s);
        digitalWrite(A1B, HIGH);
      } else if (d == 0){
        analogWrite(A1A, s);
        digitalWrite(A1B, LOW);
      }
}With the mechanical components of the sculpture complete, it was now time to connect the motor. To do so, I first soldered two wires onto the positive and negative leads of the motor. I then connected these wires into a L9110 Motor Driver so that I could rotate the motor both forwards and backwards. Lastly, I connected the driver and a potentiometer to an Arduino Uno in accodance with the tutorial we completed in class.
The code uploaded to the Arduino takes heavy inspiration from that same in class workshop. By reading in values from the potentiometer and then driving the motor forward and backward at that speed, one accomplishes a variable "waving" effect!
Overall, I am proud of how this project turned out. While the mounting of the motor and the reliability of the gear/shaft mechanism could certainly be improved going forward, this project was certainly a step in the right direction :)