
Week 6
This week, we were tasked with building a capacitve sensor as well as another sensor of our choosing. Ultimately, I decided to use an infrared LED and photodiode to create a proximity sensor. As can be seen in the video above, this sensor ultimately was able to detect the distance it was located away from an object and instruct an LED to turn on when the object was close.
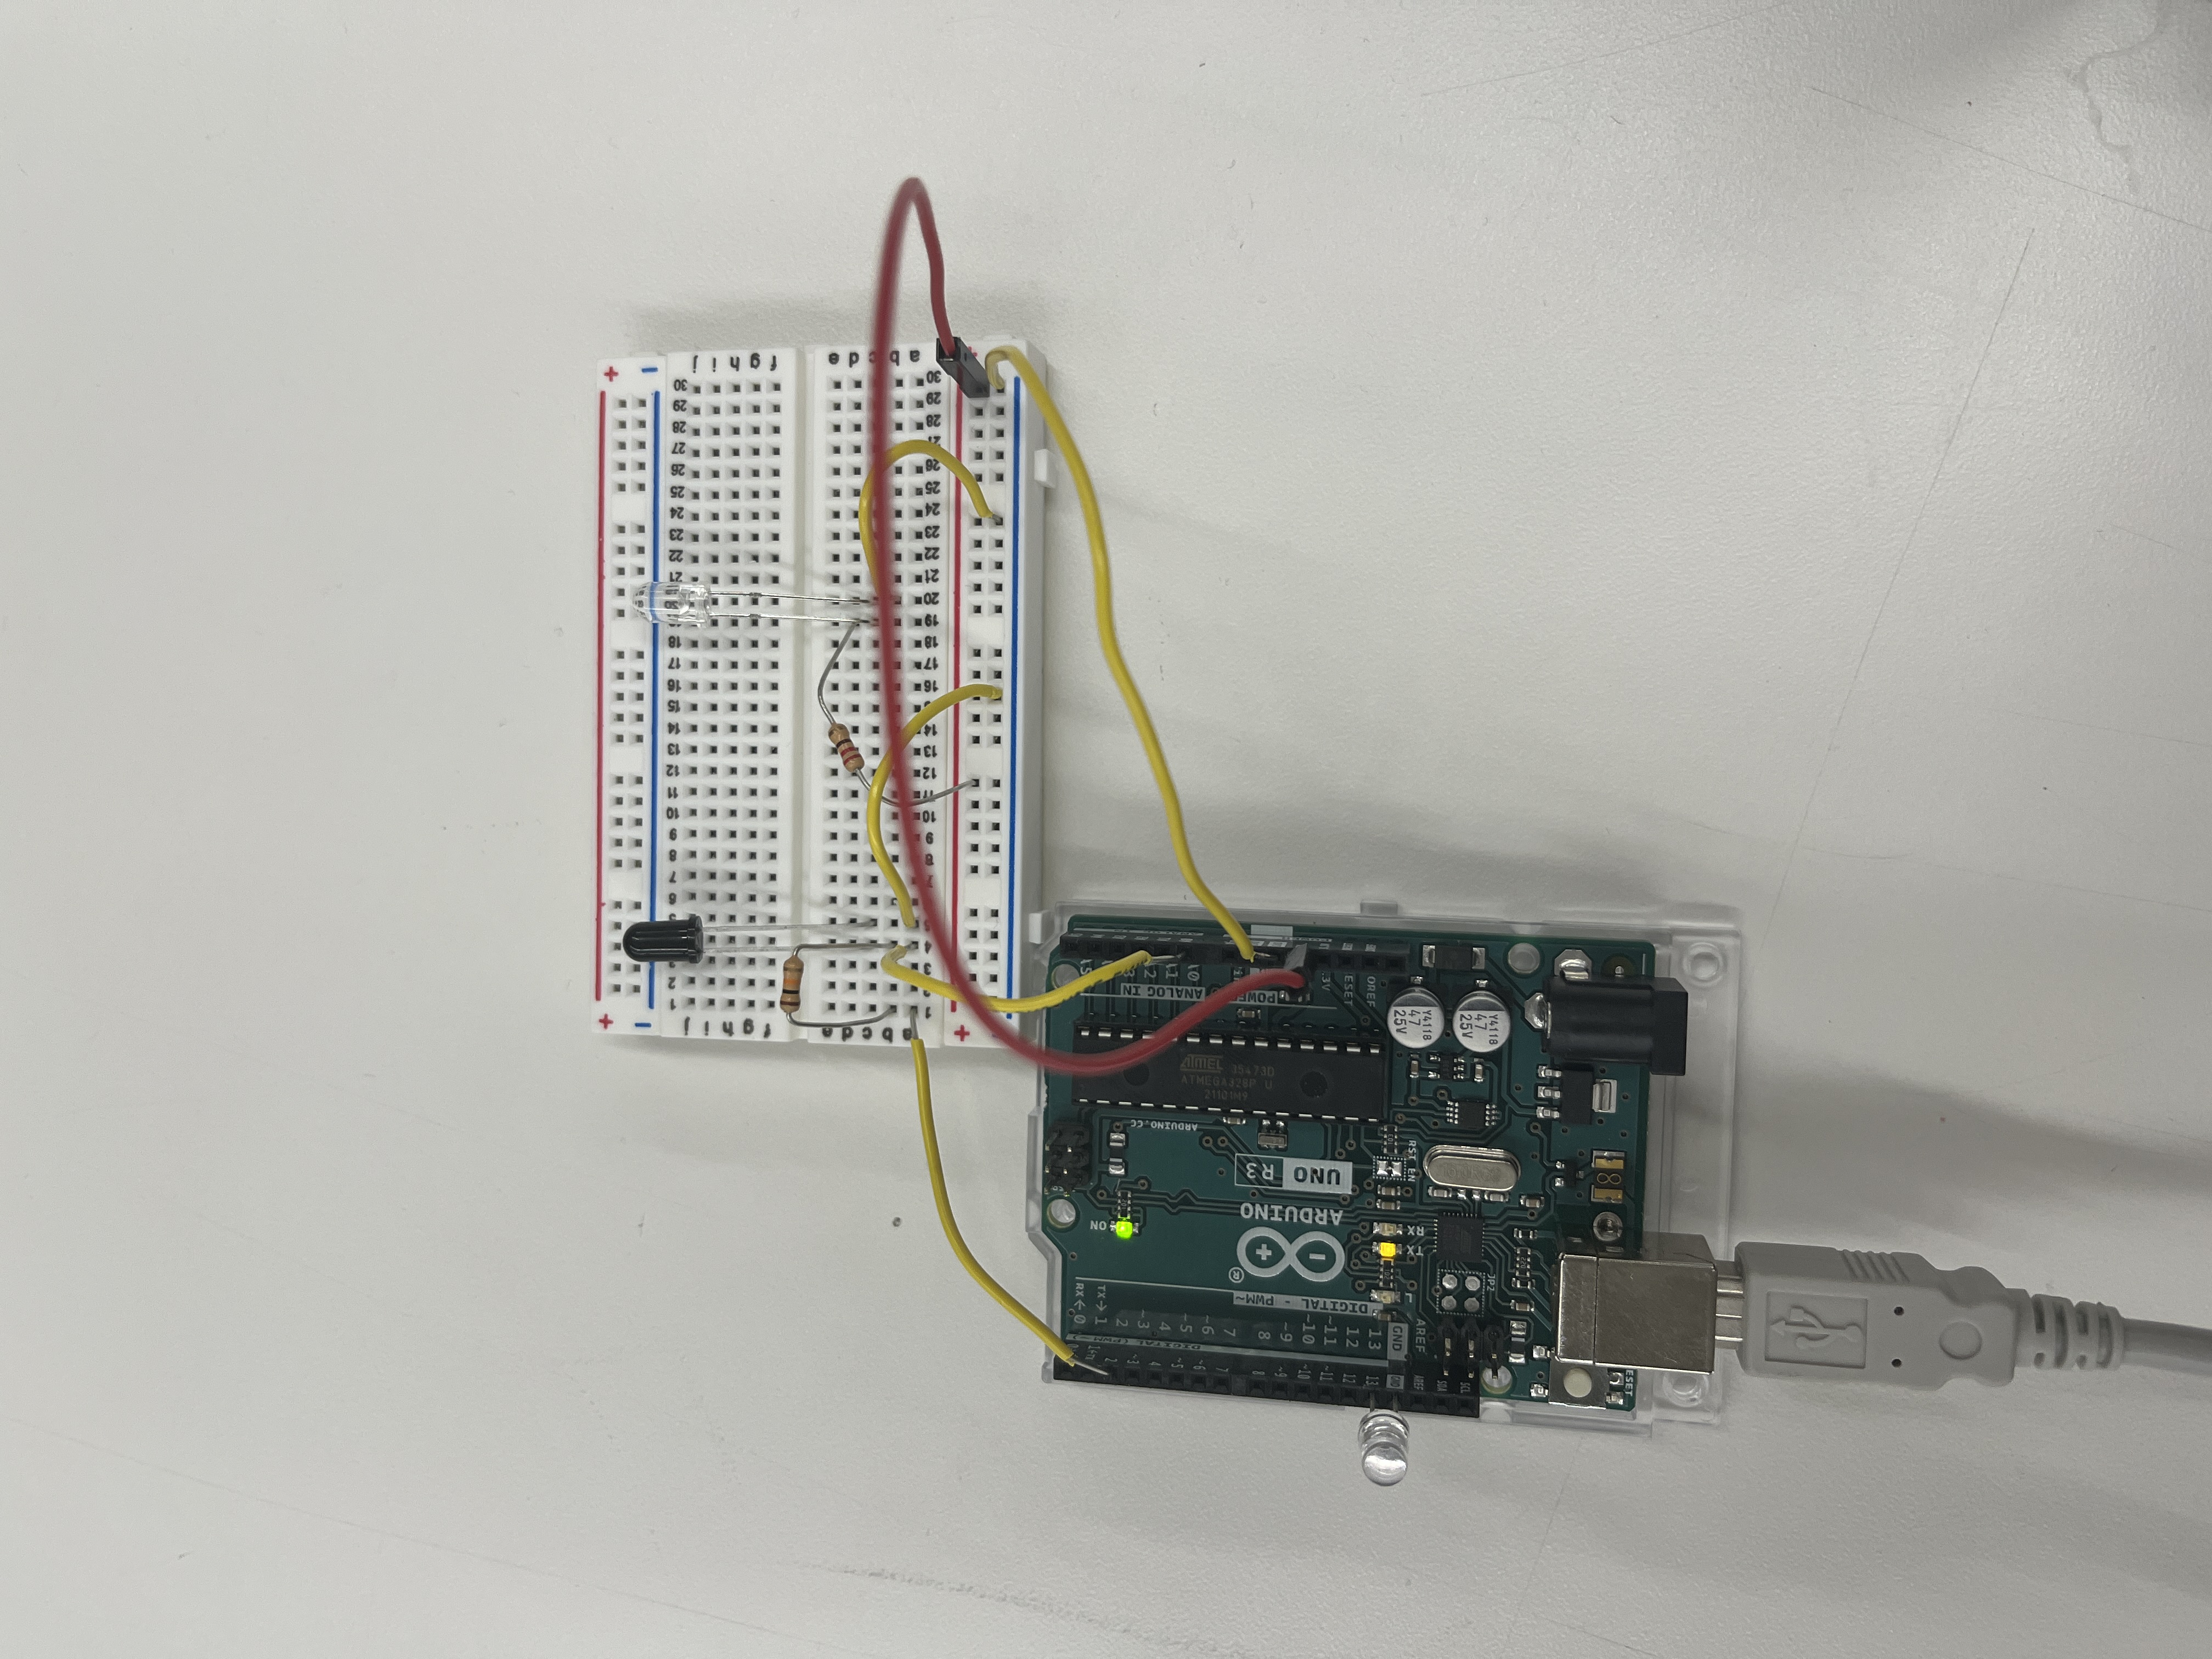
To wire the sensor together, I built a circuit (pictured at right) using two resistors, an infrared LED to emit IR light, and a photodiode to detect this light. If you are interested, you can download the code driving these sensors and the LED below. In particular, note how an object-oriented class structure was adoopted so as to minimize usage of the "delay" function and to abstract away any unnecessary details from the body of the main code.
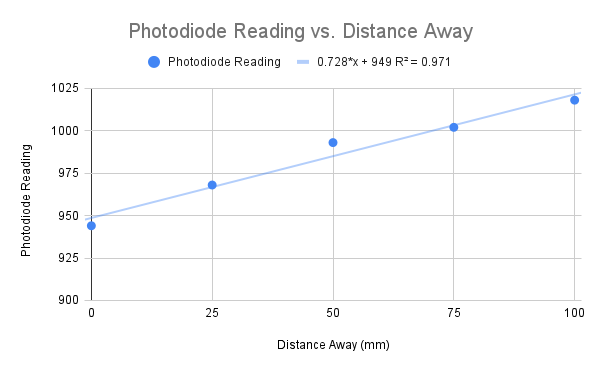
Ultimately, the results of creating this circuit were quite promising! As can be seen in the graph, as actual distance increased, readings from the sensor did as well. In particular, as can be seen in the line of best fit, for every millimeter away from the sensor, the readings from the sensor increased by 0.728.
While there are definitely some inaccuracies in these results due to fluctuations in sensor readings, overall I am very pleased with how this sensor turned out!
In addition to the photodiode sensor, I also built a capacitive sensor inspired by our work in class and in lab this week.
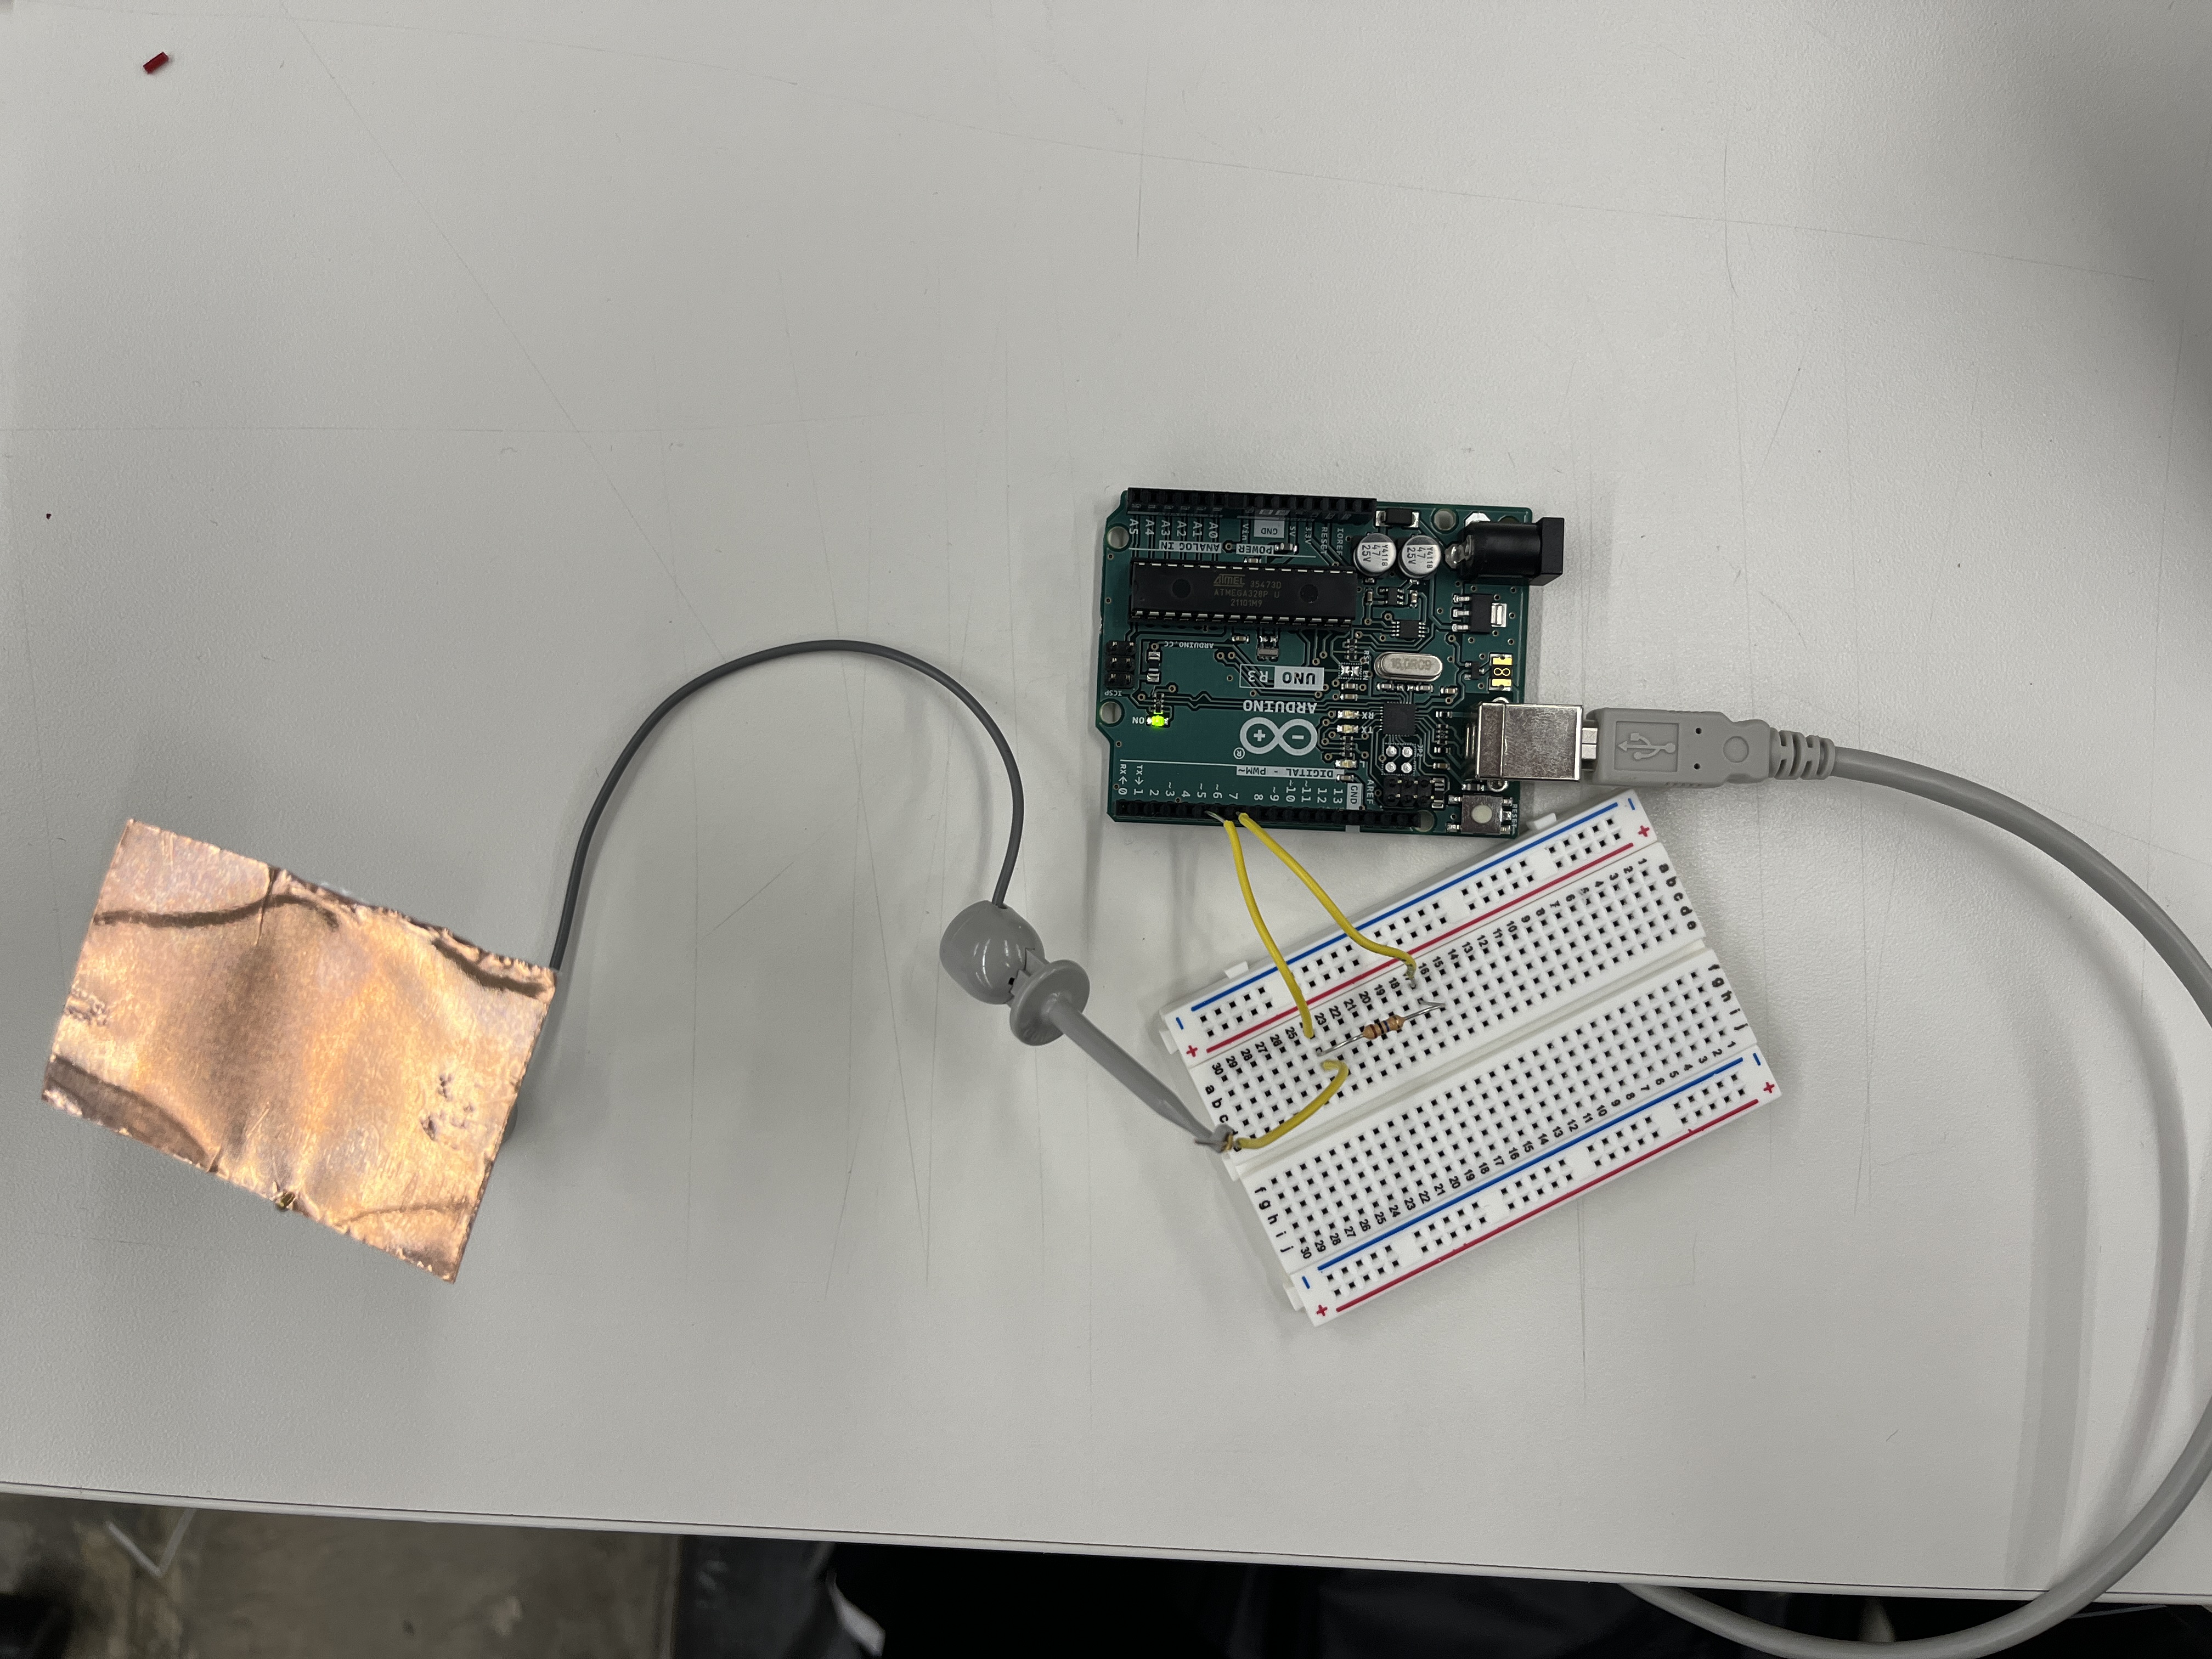
Although it took me a while to conceptually understand some of the physics behind capacitance, actually building the sensor was relatively straightforward. As can be seen in the photo, I simply connected a piece of copper to a circuit with a resistor, a pin to write to, and a pin to read from.
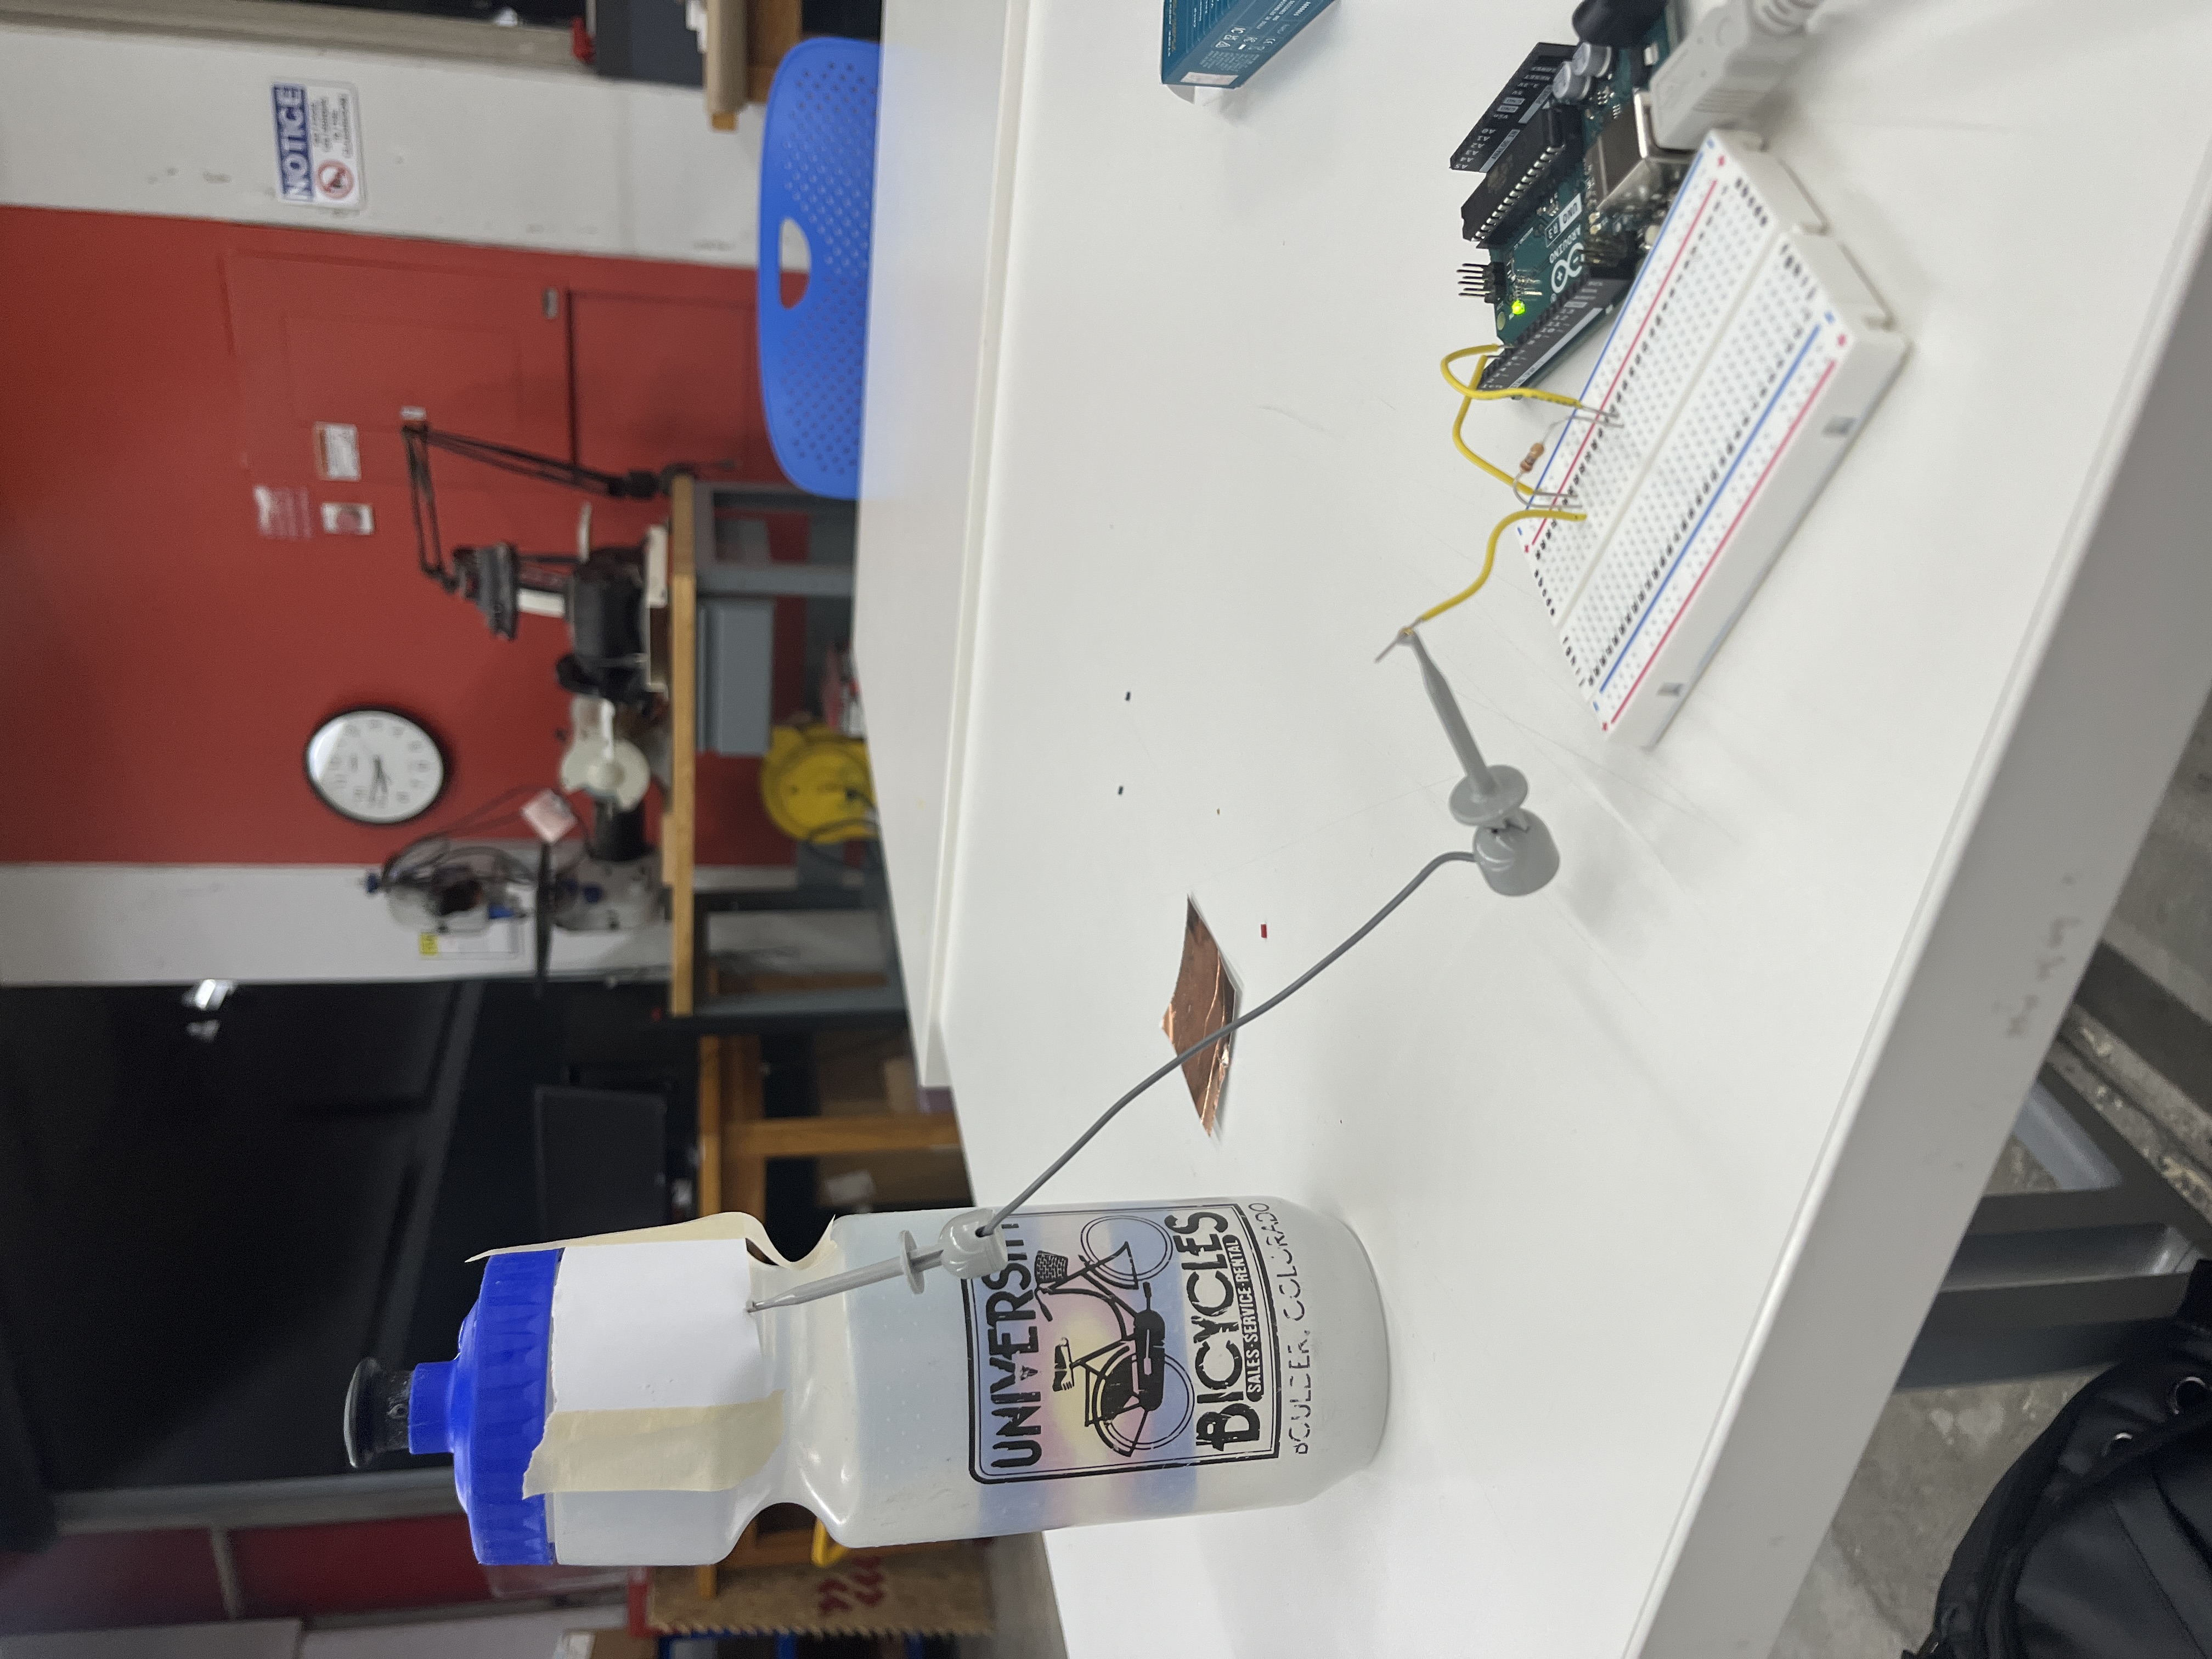
After building the circuit, it was time to test! For this experiment, I decided that I wanted to see how well the capacitive sensor could measure the amount of water in my water bottle. As such, I taped the piece of copper to the outside of my bottle and began to take measurements after drinking a certain percentage of the water.
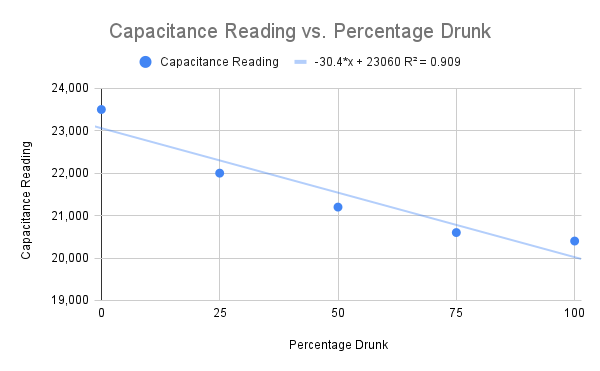
The results of this test can be seen in the graph at left. While these results were certainly noisier than my results from the IR sensor, there was still a clear downwards trend in the readings from the capacitive sensor relative to the amount of water that had been drunk from the bottle.
In particular, for every percentage of the water in the cup that was drunk, the readings from the capacitor decreased by approximately 30.4.
However, due to the nature of the code driving this project (which was heavily inspired by the code on the class website), these results were not particularly reliable nor can they be converted into the official unit of measurement for capacitance (farads). Yet, there is still a clear correlation between water in the cup and measurements from the capacitance sensor, which I think is pretty cool in and of itself!
Coding
For both the capacitive sensor and the IR sensor, I employed a class-based code structure as opposed to one which employed lots of delays and code in the main body of the program. Ultimately, I think this helped me to keep the code much neater and more maintainable going forward!
In particular, for the capacitive sensor, I was receiving results which fluctuated wildly within a certain range. To remedy this, I decided to instead average every 100 results before printing them out—a process which greatly decreased the number of fluctuations between data points. For more information on this process, feel free to check out the full code for both sensors below!
class Capacitor {
      int readPin;
      int writePin;
      unsigned long previousMicros;

    public:
      Capacitor(int pinA, int pinB) {
        readPin = pinA;
        writePin = pinB;
        previousMicros = 0;

        pinMode(readPin, INPUT);
        pinMode(writePin, OUTPUT);
      }

      long getReading() {
        previousMicros = micros();

        for (int count = 0; count < 1000; count++) {
          digitalWrite(writePin, HIGH);
          while(!digitalRead(readPin)) {}
          digitalWrite(writePin, LOW);
          while(digitalRead(readPin)) {}
        }

        return (micros() - previousMicros);
      }
    };

    Capacitor sensor(5,7);

    void setup() {
      Serial.begin(9600);
    }

    void loop() {
      long readings[100];
      for (int i = 0; i < 100; i++) {
        readings[i] = sensor.getReading();
        delay(10);
      }

      long sum = 0;

      for (int j = 0; j < 100; j++) {
        sum += readings[j];
      }

      Serial.println(sum / 100);
    }
class Photodiode {
int photoPin;
int readPin;
int value;
unsigned long previousMillis;
public:
Photodiode(int pinA, int pinB) {
photoPin = pinA;
readPin = pinB;
previousMillis = 0;
value = 0;
pinMode(photoPin, OUTPUT);
digitalWrite(photoPin, HIGH);
}
void update() {
if(previousMillis - millis() > 20) {
value = analogRead(readPin);
previousMillis = millis();
}
}
int getValue() {
return value;
}
};
Photodiode sensor(2,0);
int led=13;
int limit = 1000;
void setup()
{
pinMode(led,OUTPUT);
digitalWrite(led,LOW);
Serial.begin(9600);
}
void loop()
{
sensor.update();
int value = sensor.getValue();
Serial.println(value);
if(value <= limit)
{
digitalWrite(led, HIGH);
}
else if(value > limit)
{
digitalWrite(led,LOW);
}
}