Week 4
This week, I decided to improve upon my kinetic sculpture from last week. As can be seen in the video above, this entailed adding an ultrasonic sensor to detect when someone is standing in front of the sculpture and only instructing the sculpture to wave when they are. I also added a potentiometer to control the speed of the wave and LED lights that blink at a rate proportional to the waving speed. Though seemingly simple, adding all of these additional components created issues with powering the sculpture that made me rewire many of the components. I also had to completely redesign the body of the sculpture so as to accomodate the new components and desired functionality. Overall, though, I am very happy with how this project turned out!
From the outset, I knew that I wanted to add variable speed control to this sculpture. However, the previous design had a lot of friction between the wooden dowel holding the arms and the body of the sculpture, meaning that I could only drive the motor at top speed to get the arms to move. Thus, for this iteration, I knew that I had to decrease the amount of friction so that I could drive the motor at variable speeds.
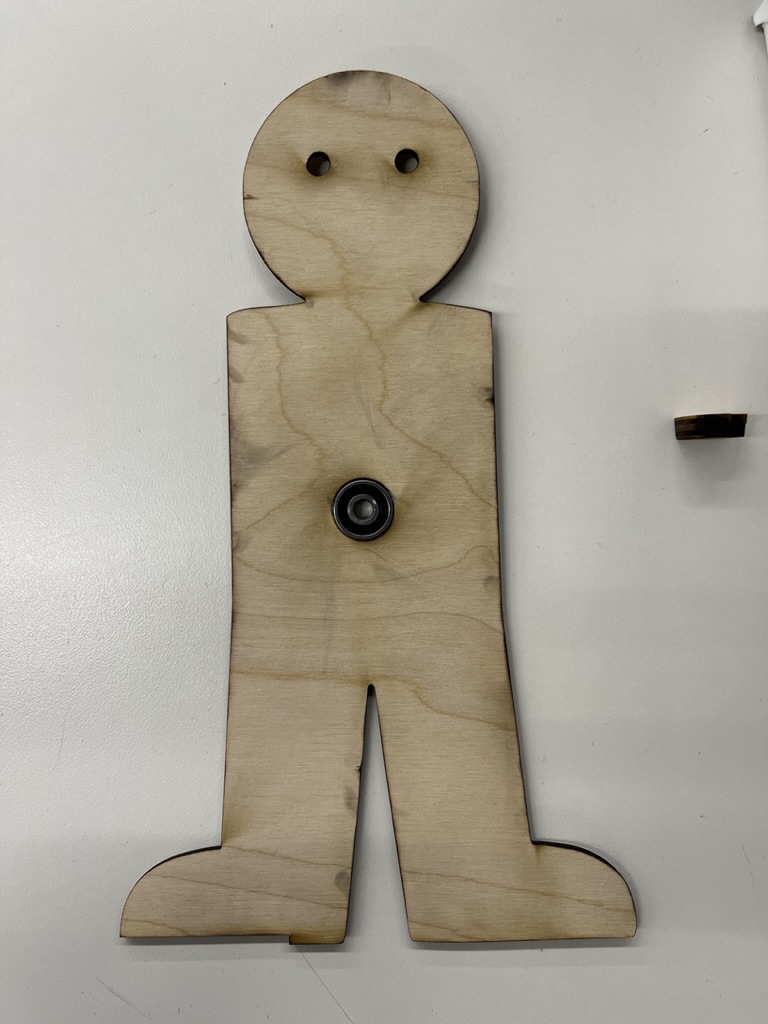
To do so, I chose to add a bearing to support the dowel through the chest, which required cutting out a larger hole. However, we did not have any drill bits large enough to cut a hole this large in the shop. Seeing as I also wanted to cut out holes in the eyes and add detail to the face, I instead chose to remake the body of the sculpture using the laser cutter. After dialing in the settings for the thicker wood, I think the results turned out pretty good!

After remaking the body, it was time to add the LED, potentiometer, and ultrasonic sensor components to the existing motor driver and Arduino setup.
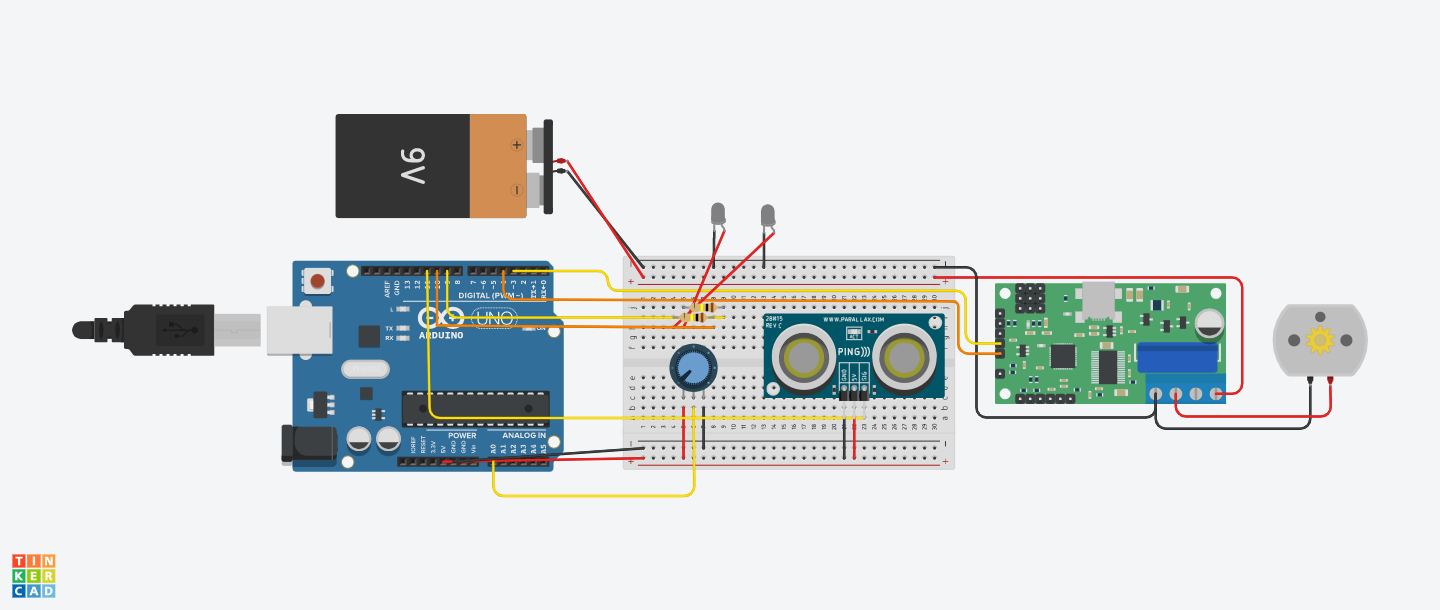
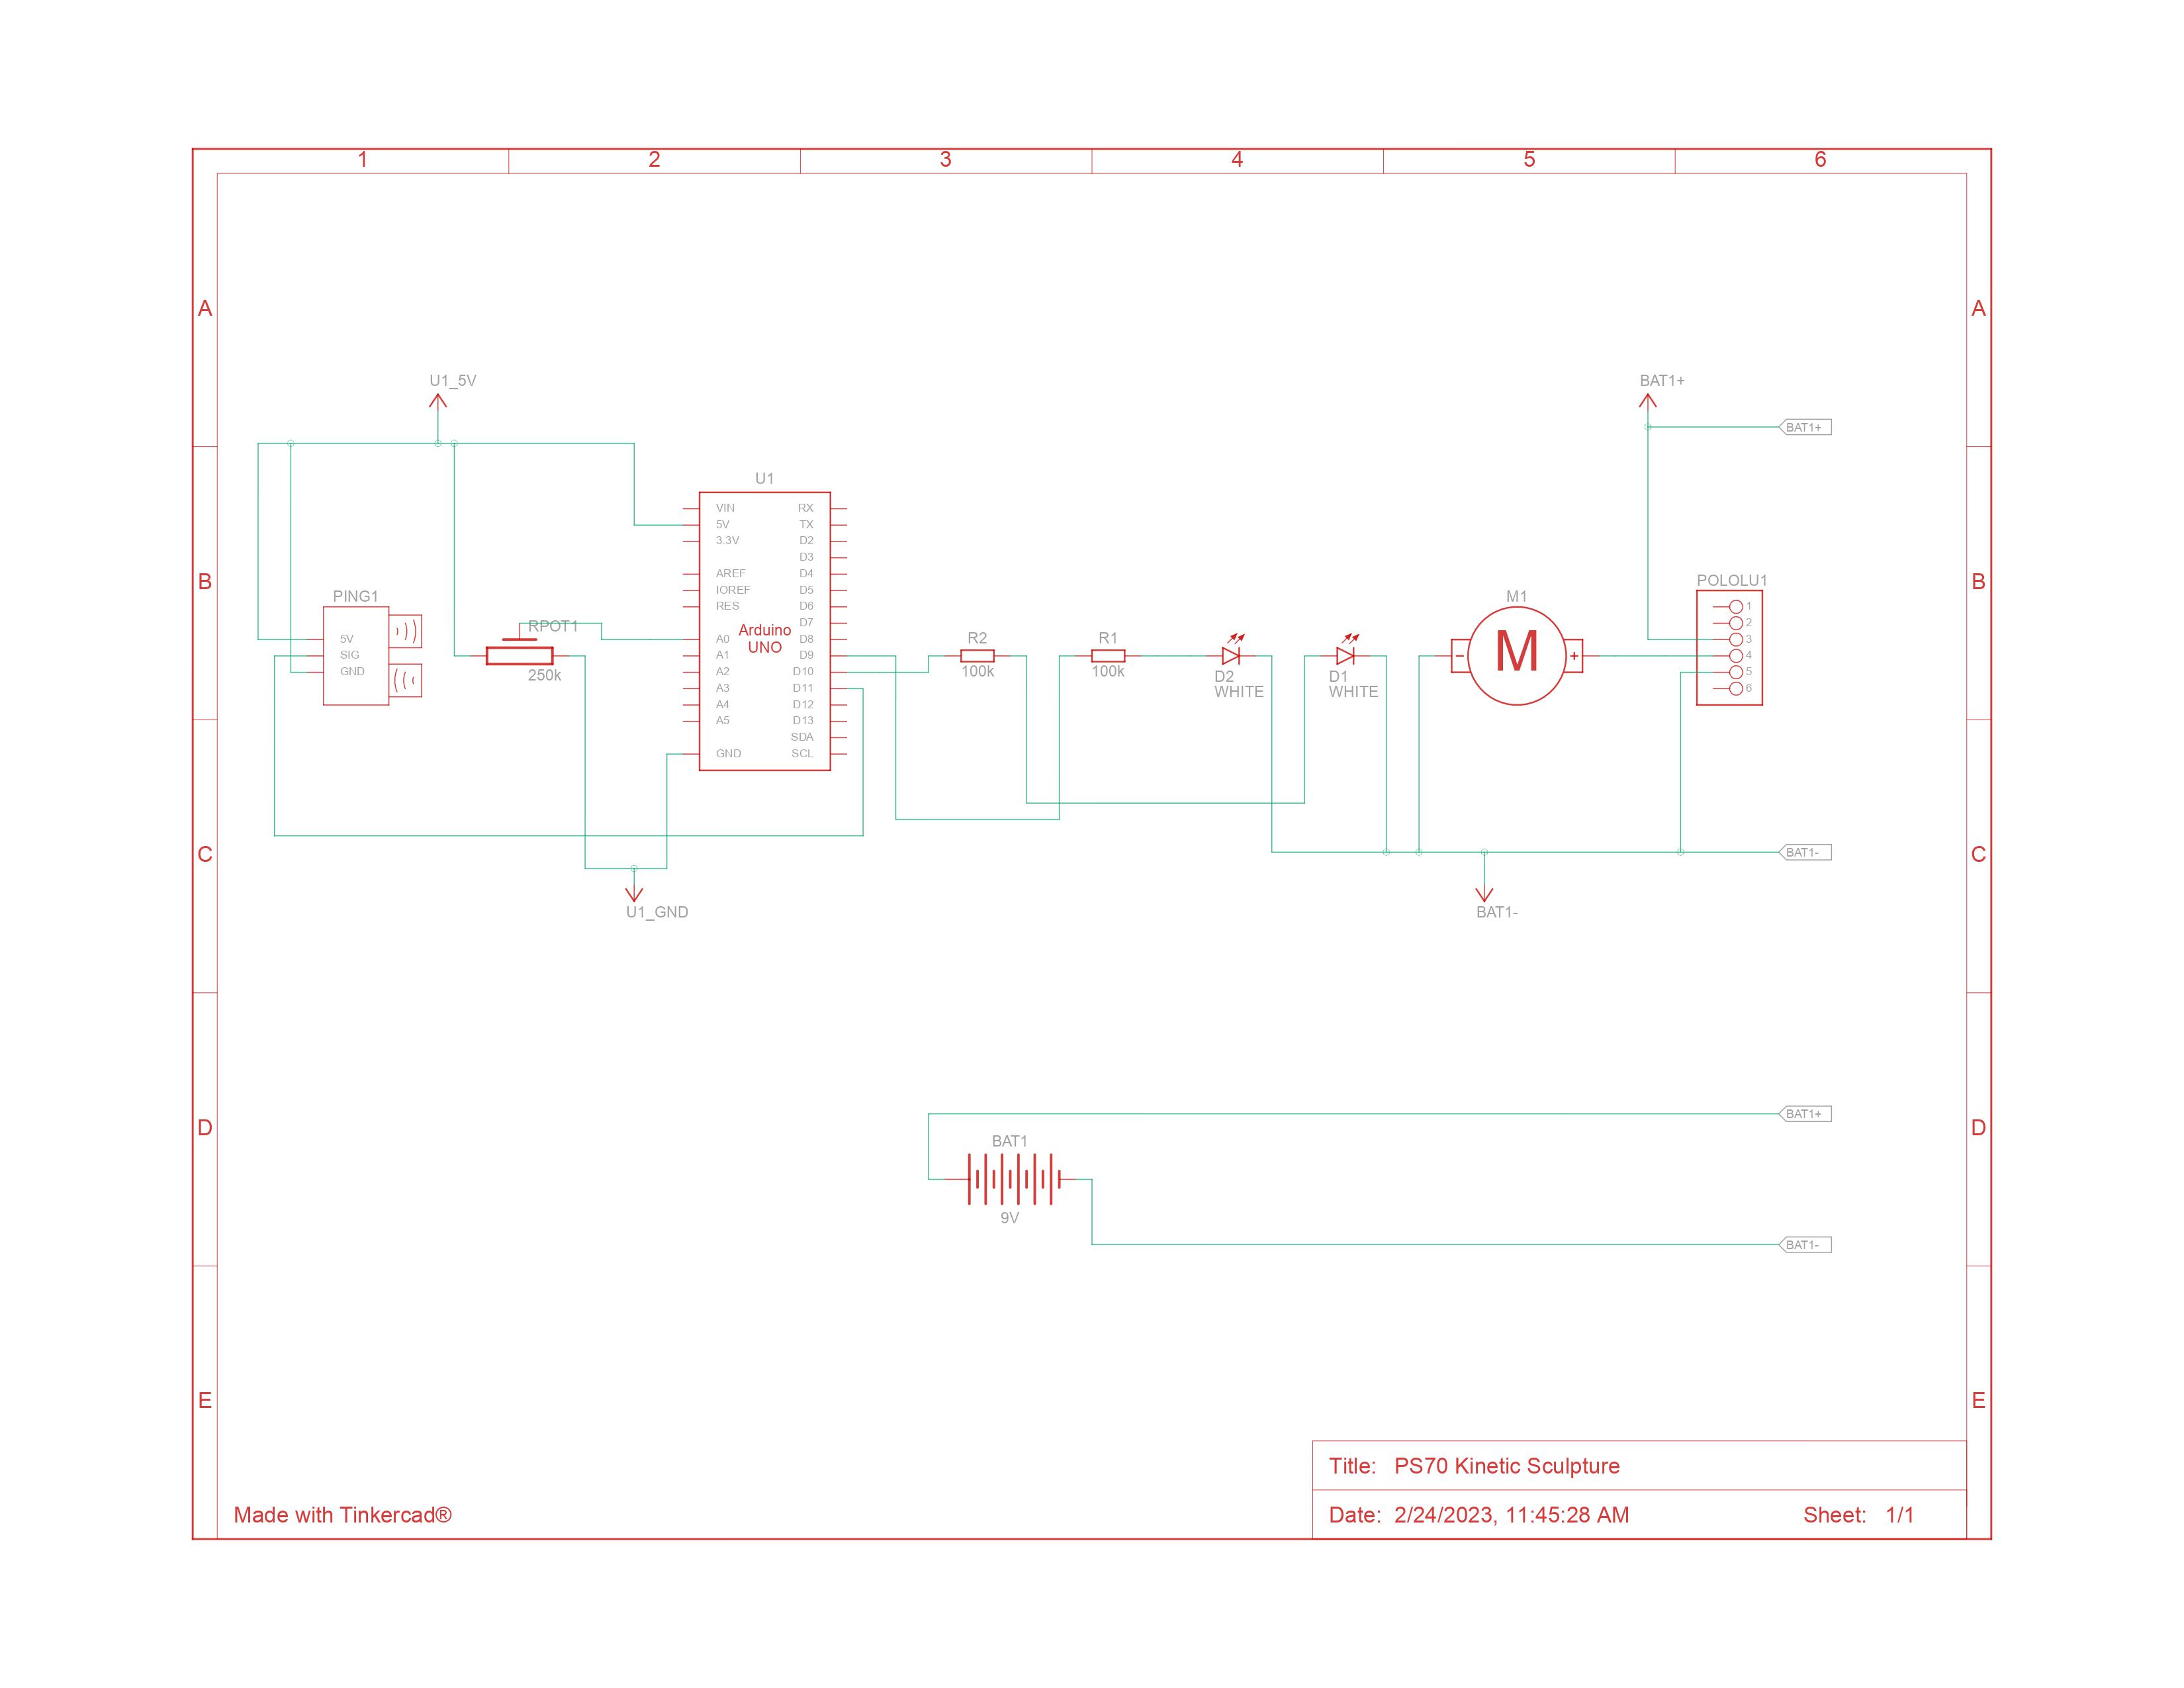
At first, I tried to add everything to a singular 5V power line and ground. However, I quickly realized that everything together drew too much current from the Arduino—causing the board to shutdown and become unresponsive. To address this issue, I then divided the wiring into two circuits—one 5V circuit coming from an external power source to power the motor driver, and one 5V circuit coming from the Arduino to power the LEDs and sensors. (Importantly, these two circuits were connected with a common ground to stabilize the voltage.)
The ultimate circuit can be seen in the images to the left. While this circuit does work, its implementation on the breadboard is quite messy. Moving forward, I would like to solder more of the wires and shorten them so as to clean up the design.


Mechanical
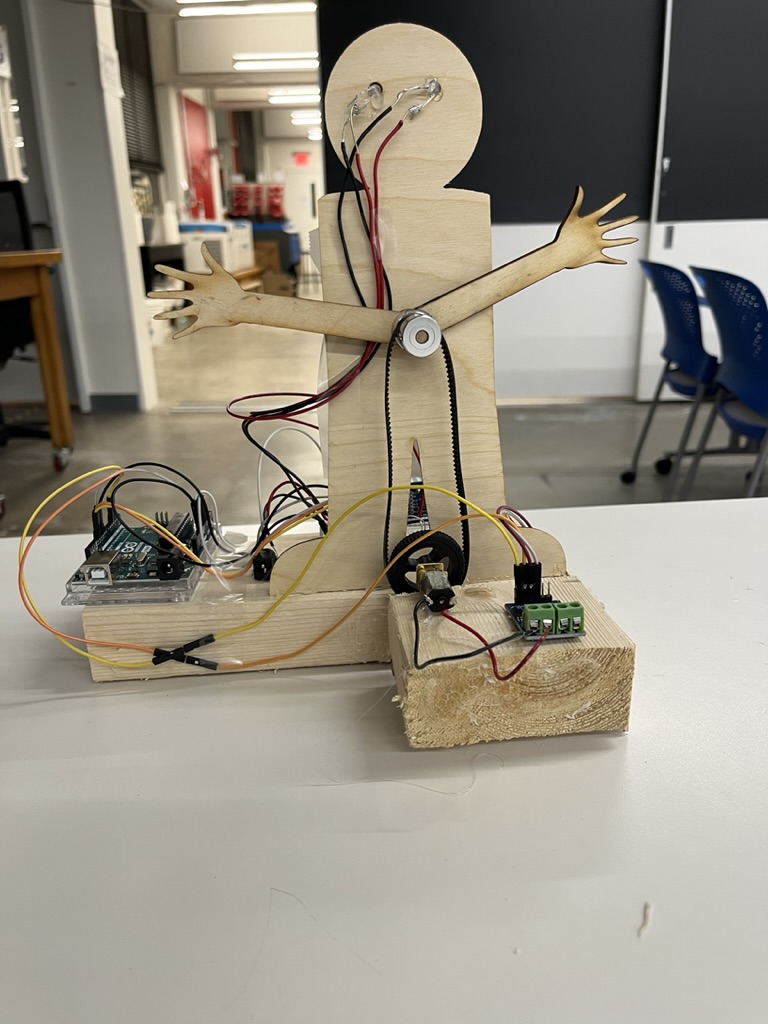
As a last step, I had to mount all of the mechanical components of the sculpture. While the sculpture itself and the breadboard were attached to the base using a basic glue adhesive, mounting the motor so that it had the correct tension on the belt proved to be substantially more challenging.
Ultimately, I ended up mounting the motor to a seperate block and then attaching this block to the main block using hot glue. While not the most technically advanced solution, this approach allowed me to fine tune the position of the motor until it was correct before setting it in place. I also ended up hot gluing the LEDs into the eye sockets and running the wiring down the back of the sculpture so as to minimize the amount of visible wires.

Coding
With its many components, this project was a good exercise in multitasking using an Arduino. In particular, I created a class for the ultrasonic sensor, DC motor, and LEDs. Each of these classes contained functions for updating at set intervals, as well as getter and setter functions for each of the relevant variables (such as the motor speed and distance from the ultrasonic sensor). Ultimately, this allowed me to avoid using the delay function and to greatly simplify the code in the loop() section of the program. For reference, the full code from this program is listed below:
class Motor {
        int A1A;
        int A1B;
        unsigned long previousMillis;
        long onInterval;
        long offInterval;
        int speed;
        int motorState;
        int direction;

      public:
        Motor(int pinA, int pinB, int setSpeed, int setOnInterval, int setOffInterval) {
          A1A = pinA;
          A1B = pinB;
          speed = setSpeed;
          onInterval = setOnInterval;
          offInterval = setOffInterval;
          previousMillis = 0;
          motorState = LOW;
          direction = 0;

          pinMode(A1A, OUTPUT);
          pinMode(A1B, OUTPUT);
        }

        void driveMotor(byte d, int s) {
          if (d == 1) {
            analogWrite(A1A, 255 - s);
            digitalWrite(A1B, HIGH);
          } else if (d == 0) {
            analogWrite(A1A, s);
            digitalWrite(A1B, LOW);
          }
        }

        void setSpeed(int newSpeed) {
          speed = newSpeed;
        }

        void setDelay(int newDelay) {
          offInterval = newDelay;
        }

        void update() {
          unsigned long currentMillis = millis();
          if ((motorState == LOW) && (currentMillis - previousMillis >= offInterval) && direction == 0) {
            driveMotor(LOW, speed);
            motorState = HIGH;
            previousMillis = currentMillis;
            direction = 1;
          } else if ((motorState == LOW) && (currentMillis - previousMillis >= offInterval) && direction == 1) {
            driveMotor(HIGH, speed);
            motorState = HIGH;
            previousMillis = currentMillis;
            direction = 0;
          } else if ((motorState == HIGH) && (currentMillis - previousMillis >= onInterval)) {
            driveMotor(LOW, 0);
            motorState = LOW;
            previousMillis = currentMillis;
          }
        }
      };

      class Ultrasonic {
        int trigPin;
        int echoPin;
        int delay;
        long duration, cm, inches;
        unsigned long previousMillis;

      public:
        Ultrasonic(int trigger, int echo, int pause) {
          trigPin = trigger;
          echoPin = echo;
          delay = pause;
          pinMode(trigPin, OUTPUT);
          pinMode(echoPin, INPUT);
        }

        void update() {
          unsigned long currentMillis = millis();
          if (currentMillis - previousMillis >= delay) {
            digitalWrite(trigPin, LOW);
            delayMicroseconds(5);
            digitalWrite(trigPin, HIGH);
            delayMicroseconds(10);
            digitalWrite(trigPin, LOW);

            duration = pulseIn(echoPin, HIGH);
            inches = (duration / 2) / 74;  // Divide by 74 or multiply by 0.0135
            previousMillis = currentMillis;

          }
        }

        int getInches() {
          return inches;
        }
      };

      class Light {
        int outputPin;
        int delay;
        int state;
        unsigned long previousMillis;

      public:
        Light(int pin, int pause) {
          outputPin = pin;
          delay = pause;
          state = LOW;
          pinMode(outputPin, OUTPUT);
        }

        void update() {
          unsigned long currentMillis = millis();
          if (currentMillis - previousMillis >= delay) {
            if (state == LOW)
              state = HIGH;
            else
              state = LOW;
            digitalWrite(outputPin, state);
            previousMillis = currentMillis;
          }
        }

        void setDelay(int newDelay) {
          delay = newDelay;
        }
      };

      Motor motor1(3, 4, 255, 150, 1000);
      Ultrasonic sensor(11, 12, 250);
      Light light1(9, 1000);
      Light light2(10, 1000);

      void setup() {
        Serial.begin(9600);
      }

      void loop() {
        sensor.update();
        int distance = sensor.getInches();
        int reading = analogRead(A0);
        Serial.println(reading);
        int motorDelay =  map(reading, 0, 1023, 1000, 200);
        int lightSpeed = map(reading, 0, 1023, 1500, 50);
        motor1.setDelay(motorDelay);
        if (distance < 20) {
          motor1.setSpeed(255);
        } else {
          motor1.setSpeed(0);
        }
        motor1.update();
        light1.setDelay(lightSpeed);
        light1.update();
        light2.setDelay(lightSpeed);
        light2.update();
      }