Week 8
The first portion of our assignment for this week was to design and manufacture an object using CNC milling.
While I was initially going to mill out my design from last week, I quickly realized that this design was not ideal. For one, the design is relatively simplistic and would not be very challenging or intellectually stimulating to create. In addition, some of the details are too intricate to be created using the 1/8th inch end mill on our ShopBot machine.
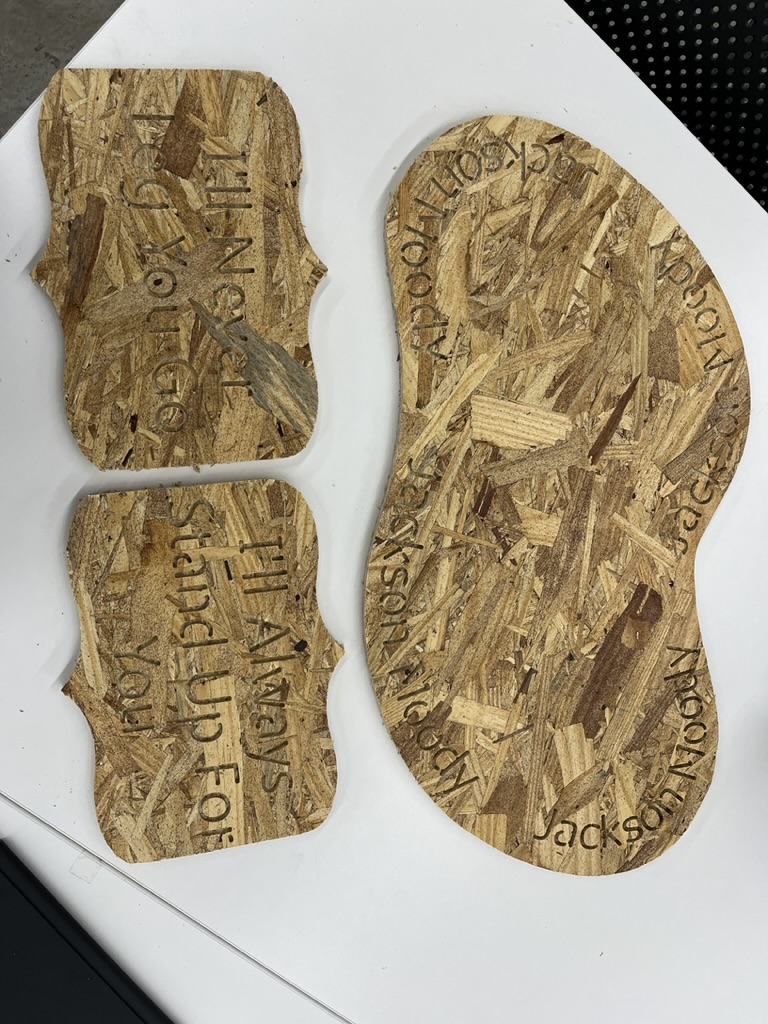
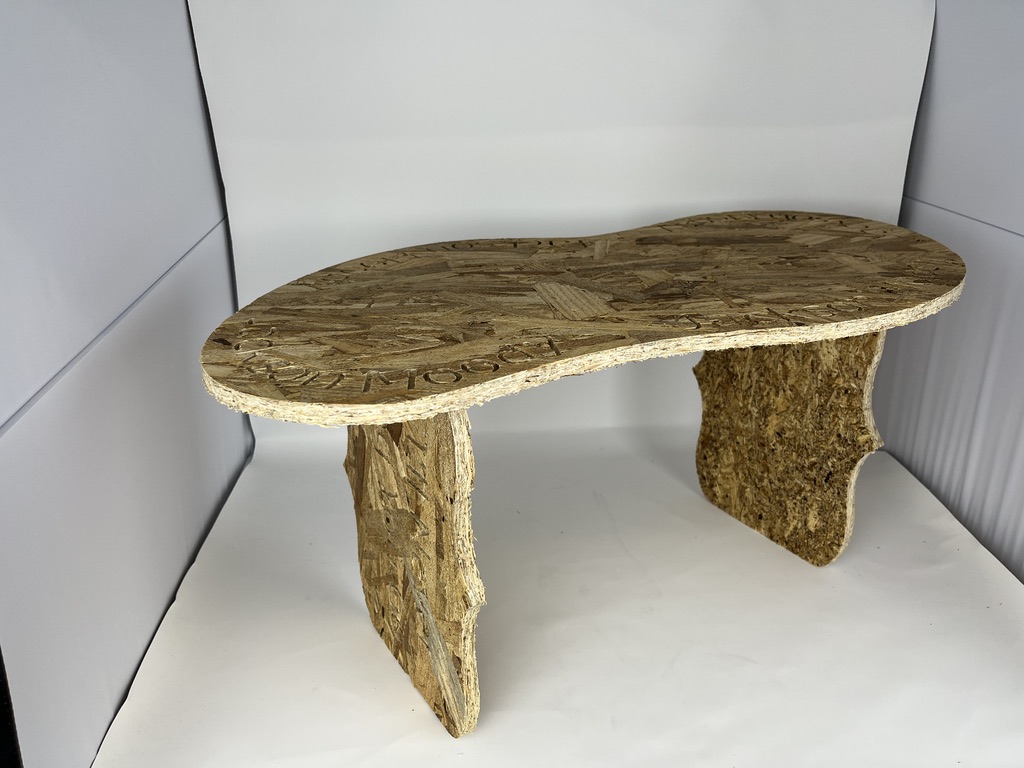
Consequently, I decided to create an entirely new design instead. Ultimately, this took the form of the coffee table/footstool-esque piece of furniture pictured on this page. As can be seen in the images, this design is very abstract, with lots of curves and intricately carved text that would be difficult to manufacture manually.
However, the process of CNC machining this design was relatively straightforward. I began by using Inkscape (as opposed to Fusion 360) to create a 2D design. This allowed me to assign specific colors to each type of milling operation that I wanted to perform. Inkscape also had a number of free form drawing tools which proved to be incredibly useful for my abstract design.
Once I had finalized the design, I exported it as a .DXF file and imported it into Aspire. Here, I assigned each toolpath to a milling operation on the ShopBot and generated the milling pathways. While Aspire itself was somewhat unintuitive to use, once I was able to generate the toolpaths, I found the ShopBot operation to be pretty straightforward. After securing the material with a nail gun, zeroing the machine, and performing an air cut, I was able to create my final table!


The other portion of our assignment this week was to create an object using molding and casting. Having never created a mold or cast before, I was very excited to try this novel technique!
For the assignment, I decided to build upon my 3D scan from week 5. That is, I wanted to take the bust of my friend that I had created, turn it into a mold, and use the mold to recreate the bust out of melted metal.
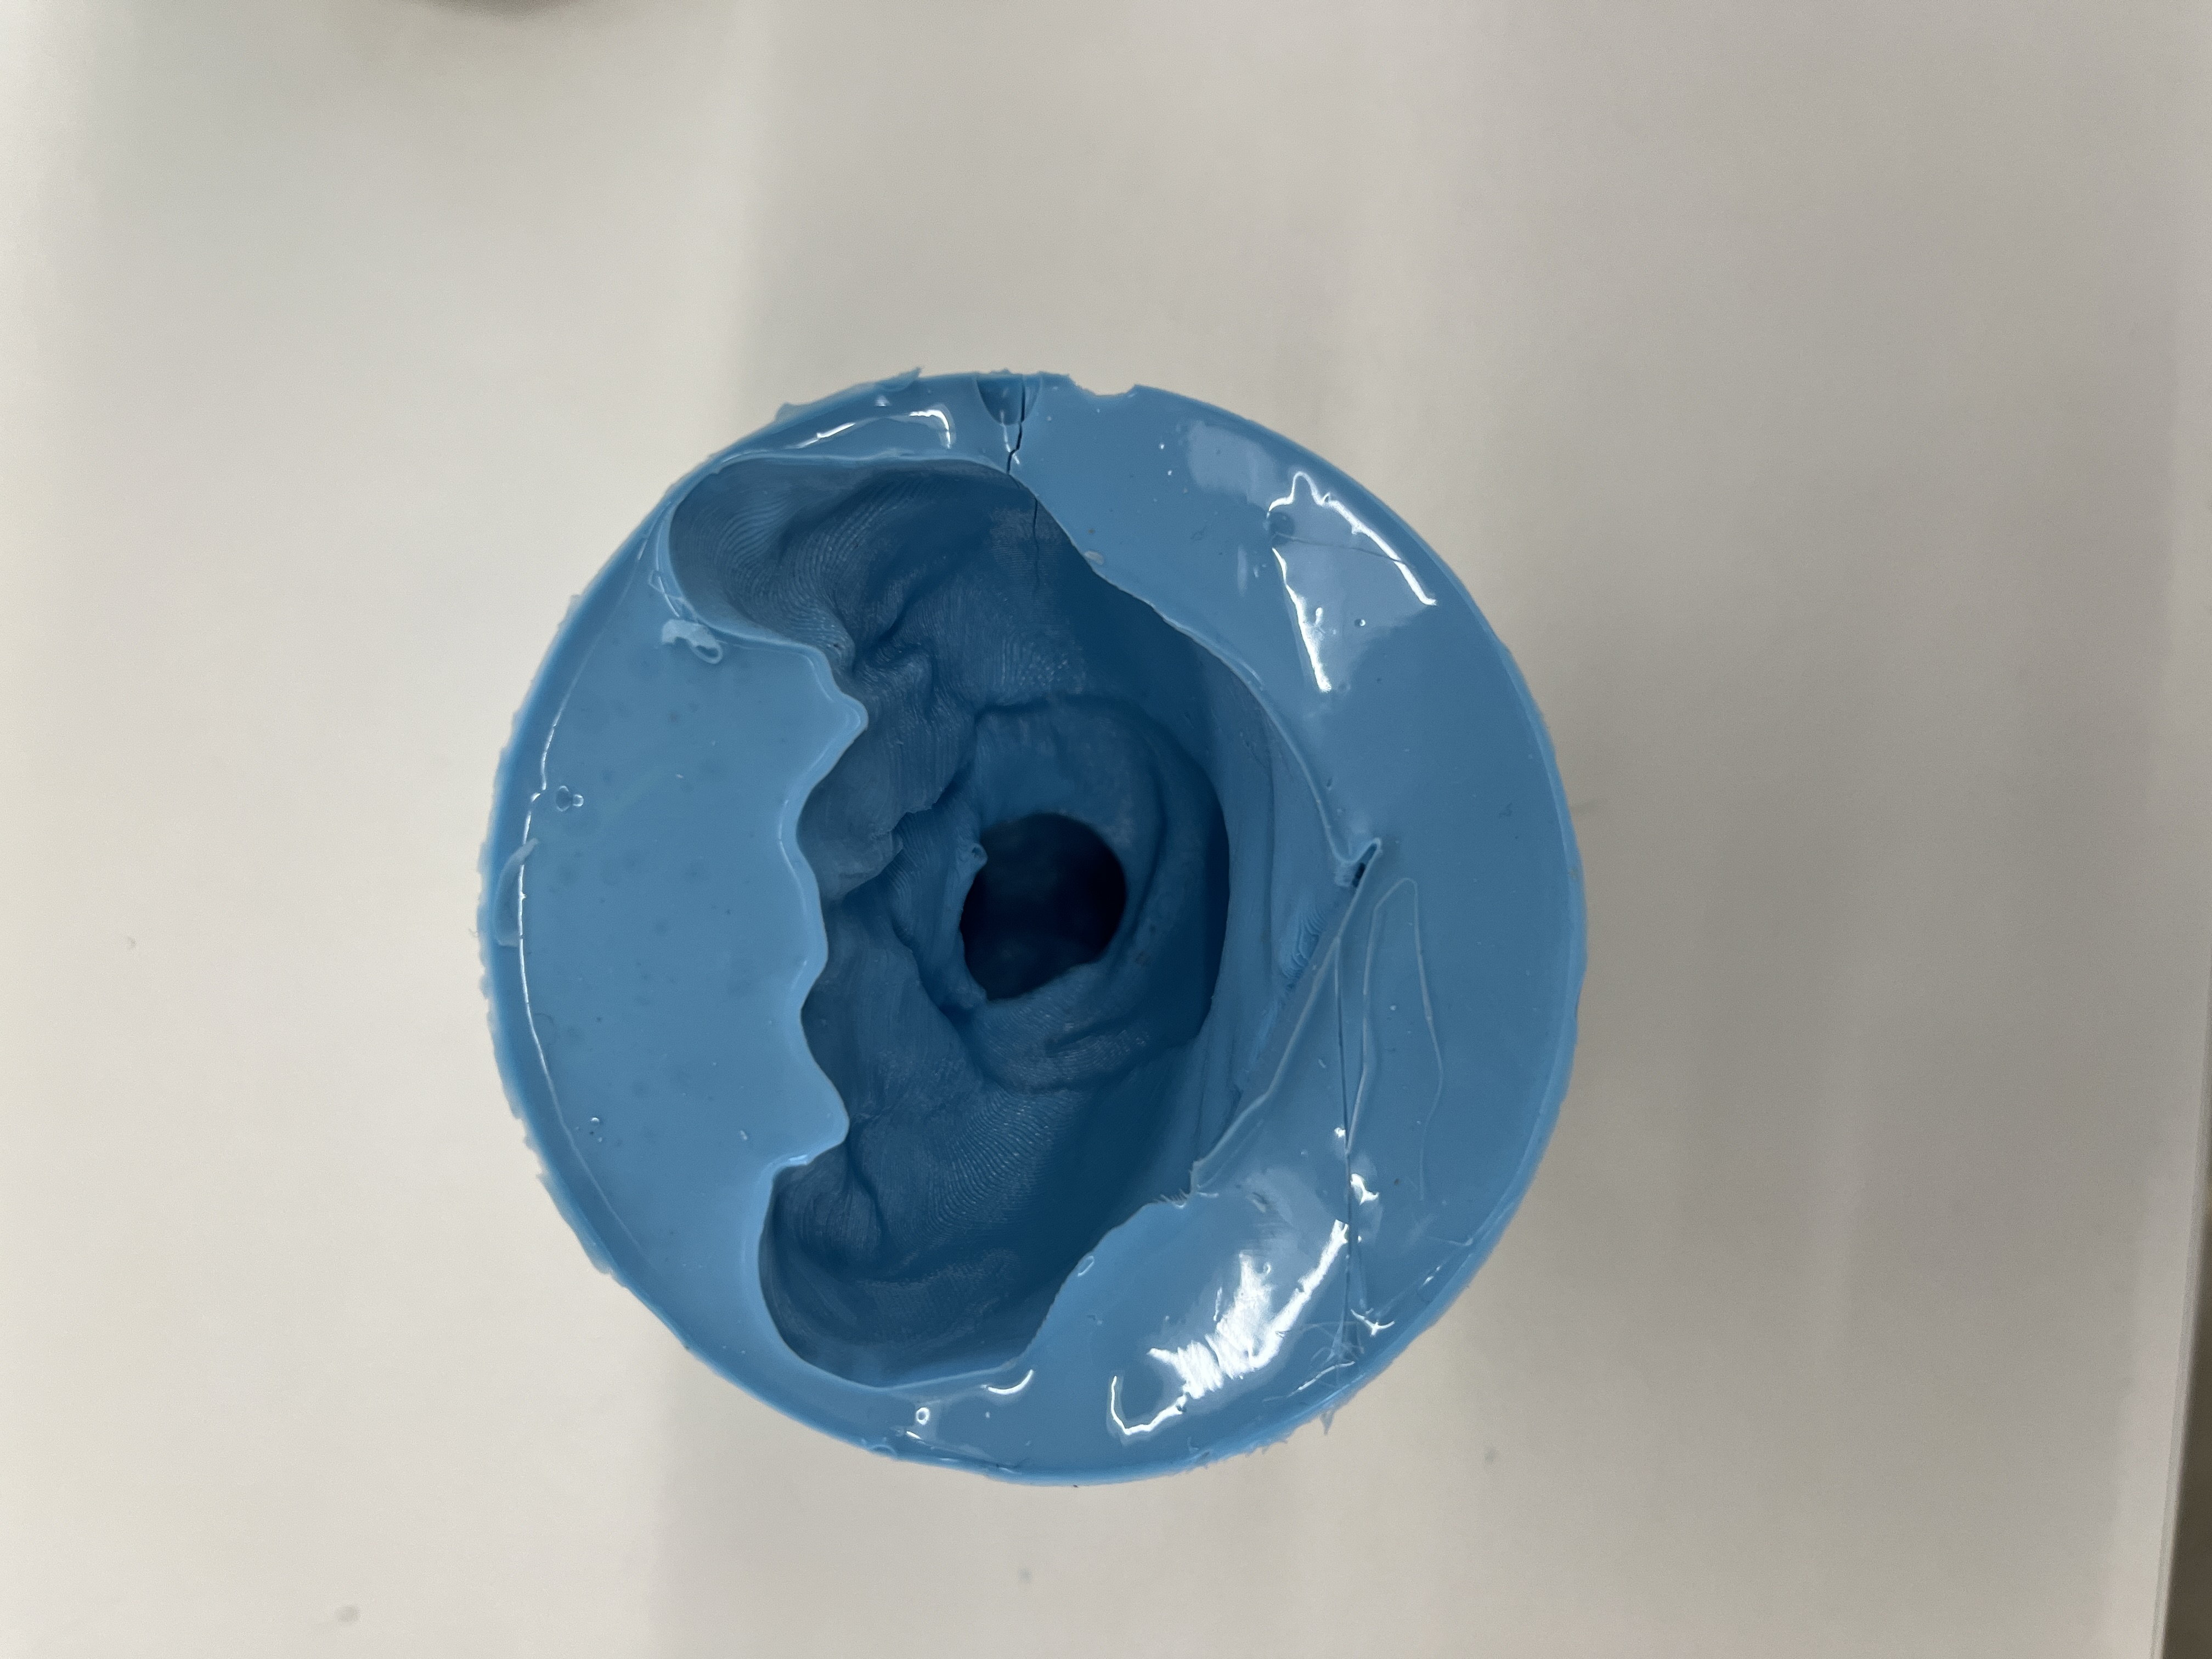
To create the mold itself, I used OOMOO®25 silicone rubber with a 1A:1B mixing ratio. By pouring this mixture into a cup with my model and letting the mixture sit over night, I was able to create the hollow mold pictured on this page.
One difficulty that I encountered at this step of the process was removing the model from the mold once it had cured. Indeed, the neck of the bust is smaller than the head, which made removing the head from the mold quite difficult. However, by creating a small slit in the side of the mold, I was ultimately able to wiggle the model out.
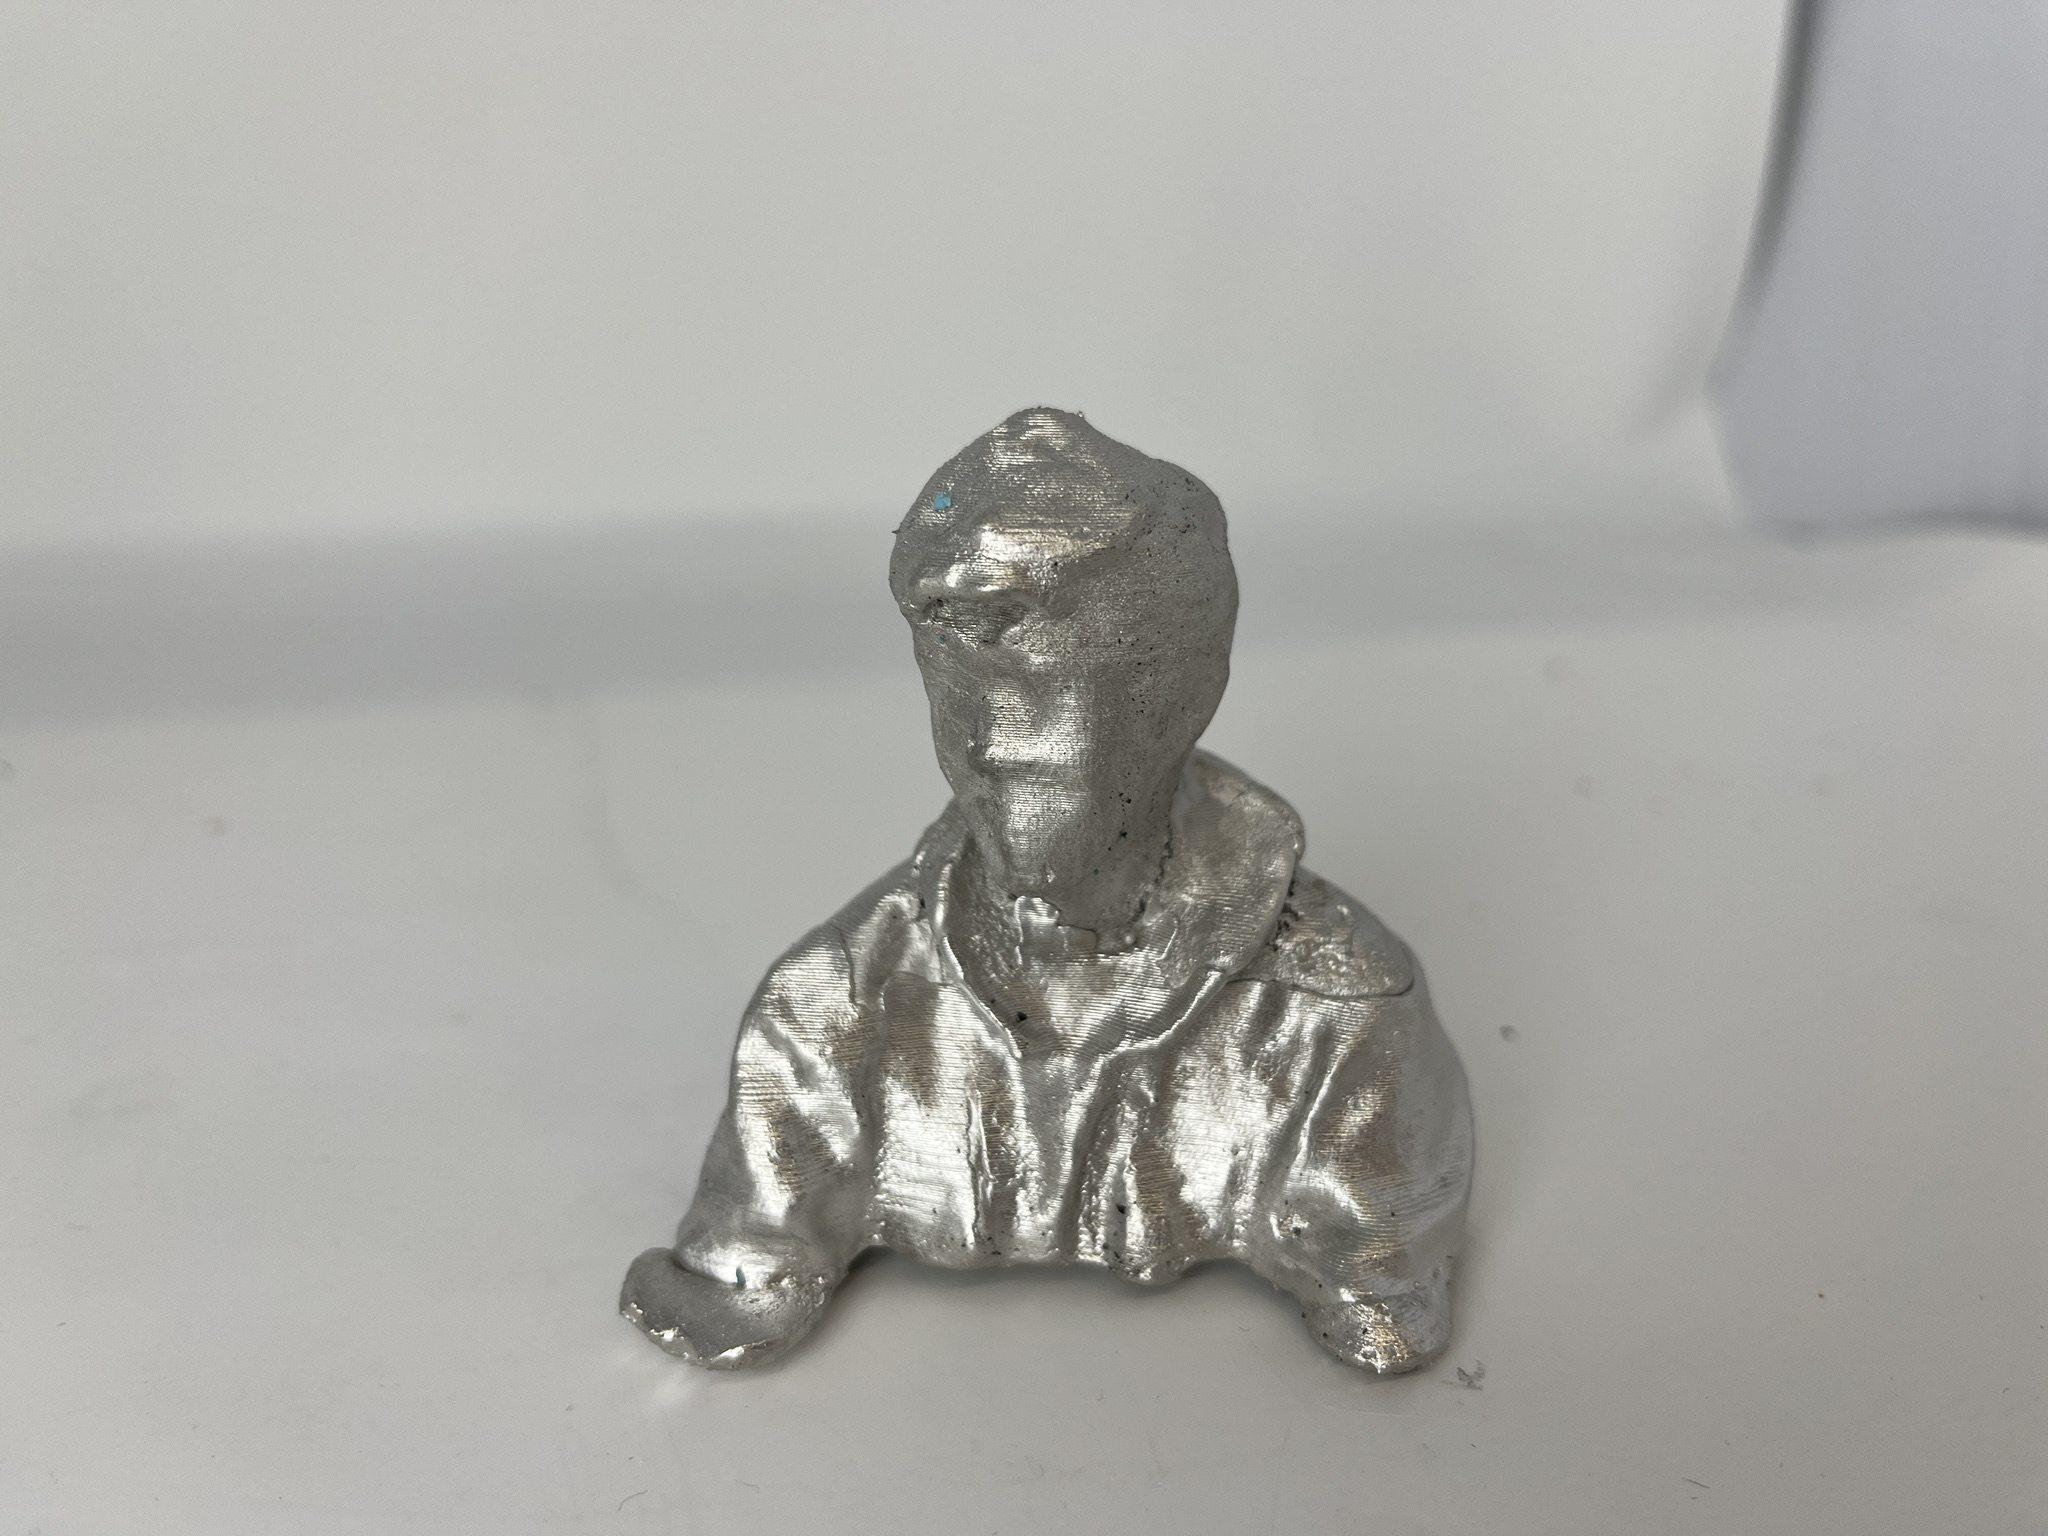
Finally, it was time to cast my object! I chose to use the liquified metal to do so, however, I initially failed to melt enough metal to fill my mold. As a result, there is a slight gap in my final cast where the new metal mixed with the old. Overall, though, I am very happy with how this cast turned out—especially for my first try!

